Saturday 2 December 2017

Reversing a PyInstaller based ransomware

Occasionally, I get questions about how to unpack PyInstaller executables using pyinstxtractor, how to identify the script of interest among the bunch of extracted files etc. In this post, I intend to cover all of these. Let's get started.

The file for our purpose is a recently identified ransomware having the following SHA256 hash.

Sample Hash: 53854221c6c1fa513d6ecf83385518dbd8b0afefd9661f6ad831a5acf33c0f8e
Download from Mega (Password: infected)

Preliminary Analysis

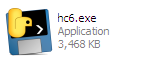
The executable "hc6.exe" has the following icon. The icon itself is a tell-tale sign that it's a PyInstaller executable.
Figure 1: Icon
Another way we can identify such files is by dropping it in a hex editor. A PyInstaller generated executable has many strings referencing python, towards the end of the binary.

Figure 2: Strings

A PyInstaller executable consists of two parts - a bootloader and a zlib archive appended to it as an overlay. The purpose of the loader is to set up the Python environment for running the application. This includes loading the Python DLL from the filesystem or from memory when the DLL is bundled within the executable. After going through a series of operations, finally it executes the main script and the control is transferred to user code. The loader also sets up hooks for resolving imports which are embedded within, the details of which are beyond the scope of this post. You can refer to the source for more information.

Extracting

Knowing that the sample is a PyInstaller generated executable we can proceed to extract its contents using pyinstxtractor as shown in Figure 3.

Figure 3: Running pyinstxtractor
The latest version (1.9) of pyinstxtractor shows which scripts are the possible entry points to the application. These are the python scripts which are run when the application is launched. Naturally, we want to begin our analysis from here. In this sample, it has identified  pyiboot01_bootstrap and hc6 as the entry points. Among the two, the former is PyInstaller specific and not of interest. The other one named hc6 does sound interesting. Let's have a look at the contents of the extracted directory before analyzing the file hc6.

Figure 4: The extracted contents
Within the extracted directory we can see a bunch of stuff - DLL files, Python C Extensions (PYD) and also a sub-directory out00-PYZ.pyz_extracted. This nested sub-directory just contains compiled python files (PYC) as shown in Figure 5. The pyc files are from the standard python library or from a 3rd party library such as PyCrypto. Hence, in this sample, we can exclude these files from analysis.

Figure 5: pyc files inside the pyz

Decompiling the main script

The main script or the entry script is named hc6, let's have a look in a hex editor.

Figure 6: hc6 in a hex editor
This does not look like python code, does it? However, this was not the case in earlier versions of PyInstaller, where the main script was left as-is, in plain text. Recent versions, compile the py source to bytecode before packaging it in the executable.

We now want to decompile this bytecode file back to python source, however, in its present form a decompiler wouldn't recognize this as a valid pyc file. The reason for this is that the magic value (i.e. the signature) is missing from this file header. A Python 2.7 pyc file begins with the bytes 03 F3 0D 0A followed by a four-byte timestamp indicating when this file was compiled. We can add these 8 bytes as shown in Figure 7.

Figure 7: Adding the missing header
With the above changes, we can now feed this file to a decompiler such as pycdc. In case you do not want to compile yourself, I have provided precompiled binaries at AppVeyor. Decompiling we get back the source.

Analyzing the ransomware

Finally, we can have a look at the ransomware in all its glory. It encrypts files from the following list of extensions.
.txt, .exe,  .php, .pl, .7z, .rar, .m4a, .wma, .avi, .wmv, .csv, .d3dbsp, .sc2save, .sie, .sum, .ibank, .t13, .t12, .qdf, .gdb, .tax, .pkpass, .bc6, .bc7, .bkp, .qic, .bkf, .sidn, .sidd, .mddata, .itl, .itdb, .icxs, .hvpl, .hplg, .hkdb, .mdbackup, .syncdb, .gho, .cas, .svg, .map, .wmo, .itm, .sb, .fos, .mcgame, .vdf, .ztmp, .sis, .sid, .ncf, .menu, .layout, .dmp, .blob, .esm, .001, .vtf, .dazip, .fpk, .mlx, .kf, .iwd, .vpk, .tor, .psk, .rim, .w3x, .fsh, .ntl, .arch00, .lvl, .snx, .cfr, .ff, .vpp_pc, .lrf, .m2, .mcmeta, .vfs0, .mpqge, .kdb, .db0, .mp3, .upx, .rofl, .hkx, .bar, .upk, .das, .iwi, .litemod, .asset, .forge, .ltx, .bsa, .apk, .re4, .sav, .lbf, .slm, .bik, .epk, .rgss3a, .pak, .big, .unity3d, .wotreplay, .xxx, .desc, .py, .m3u, .flv, .js, .css, .rb, .png, .jpeg, .p7c, .p7b, .p12, .pfx, .pem, .crt, .cer, .der, .x3f, .srw, .pef, .ptx, .r3d, .rw2, .rwl, .raw, .raf, .orf, .nrw, .mrwref, .mef, .erf, .kdc, .dcr, .cr2, .crw, .bay, .sr2, .srf, .arw, .3fr, .dng, .jpeg, .jpg, .cdr, .indd, .ai, .eps, .pdf, .pdd, .psd, .dbfv, .mdf, .wb2, .rtf, .wpd, .dxg, .xf, .dwg, .pst, .accdb, .mdb, .pptm, .pptx, .ppt, .xlk, .xlsb, .xlsm, .xlsx, .xls, .wps, .docm, .docx, .doc, .odb, .odc, .odm, .odp, .ods, .odt, .sql, .zip, .tar, .tar.gz, .tgz, .biz, .ocx, .html, .htm, .3gp, .srt, .cpp, .mid, .mkv, .mov, .asf, .mpeg, .vob, .mpg, .fla, .swf, .wav, .qcow2, .vdi, .vmdk, .vmx, .gpg, .aes, .ARC, .PAQ, .tar.bz2, .tbk, .bak, .djv, .djvu, .bmp, .cgm, .tif, .tiff, .NEF, .cmd, .class, .jar, .java, .asp, .brd, .sch, .dch, .dip, .vbs, .asm, .pas, .ldf, .ibd, .MYI, .MYD, .frm, .dbf, .SQLITEDB, .SQLITE3, .asc, .lay6, .lay, .ms11 (Security copy), .sldm, .sldx, .ppsm, .ppsx, .ppam, .docb, .mml, .sxm, .otg, .slk, .xlw, .xlt, .xlm, .xlc, .dif, .stc, .sxc, .ots, .ods, .hwp, .dotm, .dotx, .docm, .DOT, .max, .xml, .uot, .stw, .sxw, .ott, .csr, .key, wallet.dat
Encrypted files have an extension of .fucku appended to the original filename. This can be seen in the decompiled code as shown below.

Figure 8: Supported extensions
Files are encrypted with the AES cipher in CBC mode with a random IV generated per file.

Figure 9: Files are encrypted using AES

AES is no doubt a strong algorithm and infeasible to crack. However, the ransomware encrypts each file using a constant and hardcoded key which makes decryption feasible. This is shown in the figure below. The AES key used is j<L;G|hD*3CQk%I!g|Ei&#aQ6*;Vh,

Figure 10: Look, the password is hardcoded!

Decrypting encrypted files

Since we know that each files are encrypted with the same key we can develop a decrypter. However, our kind ransomware author has spared us the bother by providing the decrypter in the same code.

Figure 11: Bundled decrypter

The function decrypt decrypts an encrypted file. It's not called from anywhere, indicating it was there for testing purposes and was not removed in the final build.

There is no need to pay the ransom if someone is infected by this ransomware. A free decrypter is available from the malware hunter team. Kudos to them for their fabulous work!

Wednesday 29 November 2017

Pyinstaller Extractor updated to v1.9

PyInstaller Extractor has been updated to v1.9. The features of this release includes:

  • Support for Pyinstaller 3.3
  • Display the scripts which are run at entry point 

Support for Pyinstaller 3.3

Self explanatory. For extending the support to Pyinstaller 3.3 no major changes had to be introduced. The earlier script works as-is.

Display the scripts which are run at entry point

A Pyinstaller executable have many embedded files in it. Naturally, users of this tool had difficulty identifying which of the extracted files are of interest. With this update, pyinstxtractor now shows a list of python scripts which are run by the executable at load time. An example is shown in the screenshot below.


pyiboot01_bootstrap and main are the scripts which are run at load time. Out of this two, the former is Pyinstaller specific and not interesting for our purpose. Hence you should start the analysis from the file named main located within the _extracted directory.

As usual, pyinstxtractor can be found at SourceForge.

Monday 27 November 2017

TUCTF Write-up - RE track


TU CTF is an introductory CTF for teams that want to build their experience. We will have the standard categories of Web, Forensics, Crypto, RE, and Exploit, as well as some other categories we don't want to reveal just yet. If you have any questions, our contact is at the bottom of each page, but please read the official rules before sending us any emails.
This is a write-up for the Reversing challenges in TU CTF 2017.

Funmail [25]

Figure 1: Challenge description
This is straightforward. The challenge requires a password which is hardcoded within the binary as shown in the Figure 2.

Figure 2: Hardcoded password

Monday 20 November 2017

bnpy - A python architecture plugin for Binary Ninja

Recently I got a chance to try out Vector 35's Binary Ninja, and I must say the experience has been great so far. The good thing about binary ninja (binja henceforth) is its API, we can easily custom plugins for various purposes such as a disassembler for a foreign architecture. We can do the same in IDA, but developing processor plugins in IDA is not for the faint of heart. At the moment, binja is  entirely a static analysis tool but we do have plugins like binjatron that attempts to fill this void.

Playing with the binja API, I developed bnpy - a disassembler for python bytecode. In the binja terminology this is called as an Architecture plugin. At the moment it works for raw python bytecode, i.e. you must extract the instruction stream from a pyc file in order to use it.

In the near future, I plan to extend it so that it can disassemble a pyc (compiled python) file right out of the box. Right now, this is difficult due to certain limitations in the API. To understand this we need to know a bit more about the pyc format.

The pyc file is not a flat file format like a PE or ELF.  It is a nested format bearing a tree-like structure. A pyc file contains a single top-level code object. Among other things, a code object stores an array of constants used by the code. This array is called as co_consts. The constants can be integers, strings and even another nested code object. The code object also stores the bytecode instructions in a string named as co_code. At the moment, the bnpy plugin operates on this instruction string. To better describe the structure of pyc files we can refer to  the following image taken from kaitai struct.

Fig. 1: The structure of a pyc file
You can see, the code objects within a pyc file are nested. The function view in binja is flat and thus not suitable for displaying a tree structure. As of now, the plugin can be used on the raw bytecode stream. Steps for extracting the bytecode along with other directions can be found on the plugin page at GitHub.

https://github.com/extremecoders-re/bnpy

To conclude this short post, here is a GIF of the plugin in action.


Sunday 15 October 2017

Flare-On Challenge 2017 Writeup

Flare-on is an annual CTF style challenge organized by Fire-eye with a focus on reverse engineering. The contest falls into its fourth year this season. Taking part in these challenges gives us a nice opportunity to learn something new and this year was no exception. Overall, there were 12 challenges to complete. Official solution to the challenges has already been published at the FireEye blog. Hence instead of a detailed write-up, I will just cover the important parts.

#1 - Login.html

The first problem was as simple as it gets. There is an HTML file with a form. We need to provide a flag and check for its correctness.

Figure 1: Check thy flag
The code simply performs a ROT-13 of the input and compares it with another string. To get back the flag, re-apply ROT-13.

Figure 2: ROT-13 again
Flag: ClientSideLoginsAreEasy@flare-on.com

Tuesday 11 July 2017

Deobfuscating PjOrion using bytecode simplifier

Bytecode simplifier is a tool to de-obfuscate PjOrion protected python scripts. This post is a short tutorial to show how to use this module to deobfuscate a protected python script.

I have used the sample code below to demonstrate its usage. This is a small program to calculate the factorial of a number.

# Python program to find the factorial of a number using recursion
 
def recur_factorial(n):
   """Function to return the factorial
   of a number using recursion"""
   if n == 1:
       return n
   else:
       return n*recur_factorial(n-1)
 
 
# take input from the user
num = int(input("Enter a number: "))
 
# check is the number is negative
if num < 0:
   print("Sorry, factorial does not exist for negative numbers")
elif num == 0:
   print("The factorial of 0 is 1")
else:
   print("The factorial of",num,"is",recur_factorial(num))

Monday 10 July 2017

Introducing bytecode simplifier

Bytecode simplifier is a tool to deobfuscate PjOrion protected python scripts. It is a complete rewrite of my earlier tool PjOrion Deobfuscator. I have reimplemented the deobfuscation functionality from scratch and have used networkx specifically for this purpose. Using networkx made reasoning about the code much simpler.
The PjOrion version used is 1.3.2 (Filename: PjOrion_Uncompyle6_01.10.2016.zip)

The code is at https://github.com/extremecoders-re/bytecode_simplifier

A short tutorial can be found here: https://0xec.blogspot.com/2017/07/deobfuscating-pjorion-using-bytecode.html

Friday 31 March 2017

Remote debugging in IDA Pro by http tunnelling

IDA Pro provides remote debugging capability that allows us to debug a target binary residing on a different machine over the network. This feature is very useful in situations such as when we want to debug an executable for an arm device as installing IDA on it is not possible. IDA can remotely debug another binary in two ways - through a gdbserver or by the provided debugger servers (located in dbgsrv directory).

These debugging servers transport the debugger commands, messages and relevant data over a TCP/IP network through BSD sockets. So far so good, but what if the debugging server resided on a virtual host hosting multiple domain names? We cannot use sockets anymore.

A socket connection between two endpoints is characterized by a pair of socket addresses, one for each node. The socket address, in turn, comprises of the IP address and a port number. For an incoming socket connection, a server hosting multiple domains on the same IP address cannot decide which domain to actually forward the request based on socket address alone. Thus remote debugging using sockets is not possible. However, this is not entirely true as there are techniques such as port forwarding (aka virtual server) that can be used to reroute the incoming traffic to various private IPs based on a pre-decided table. Port forwarding capability is not available everywhere so we can ignore it for now. Instead, it would be much better if sockets supported connections based on domain names as described in this paper Name-based Virtual Hosting in TCP.

The Application Layer Protocol HTTP solves the virtual host problem by including the Host header in HTTP messages. It seems that if we can wrap the transport layer socket traffic in plain old HTTP messages our problem would be solved. The rest of the blog post describes this process in detail.

Sunday 26 March 2017

67,000 cuts with python-pefile

EasyCTF featured an interesting reversing engineering challenge. The problem statement is shown in Figure 1.
Figure 1: Problem statement
A file 67k.zip was provided containing 67,085 PE files numbered from 00000.exe to 1060c.exe as shown in Figure 2.

67k files to reverse
Figure 2: 67k files to reverse!


Thursday 16 March 2017

Hacking the CPython virtual machine to support bytecode debugging


As you may know, Python is an interpreted programming language. By Python, I am referring to the standard implementation i.e CPython. The implication of being interpreted means that python code is never directly executed by the processor. The python compiler converts the source code into an intermediate representation called as the bytecode. The bytecode consists of instructions which at runtime are interpreted by the CPython virtual machine. For knowing more about the nitty-gritty details refer to ceval.c.

Unfortunately, the standard python implementation does not provide a way to debug the bytecode when they are being executed on the virtual machine. You may question, why is that even needed as I can already debug python source code using pdb and similar tools. Also, gdb 7 and above support debugging the virtual machine itself so bytecode debugging may seem unnecessary.

However, that is only one side of the coin. Pdb can be used for debugging only when the source code is available. Gdb no doubt can debug without the source as we are dealing directly with the virtual machine but it is too low level for our tasks. This is akin to finding bugs in your C code by using an In-Circuit Emulator on the processor. Sure, you would find bugs if you have the time and patience but it is unusable for the most of us. What we need, is something in between, one which can not only debug without source but also is not too low-level and can understand the python specific implementation details. Further, it would be an icing on the cake if this system can be implemented directly in python code.

Tuesday 14 February 2017

Extracting encrypted pyinstaller executables

UPDATE: For recent PyInstaller versions, the script below won't work. Please visit the pyinstxtractor wiki for more information.
 
It has been more than a quarter since the last post, and in the meantime, I was very busy and did not have the time to write a proper post. The good news is at the moment, I am comparatively free and can put in a quick post. 

As said earlier, PyInstaller provides an option to encrypt the embedded files within the executable. This feature can be used by supplying an argument --key=key-string while generating the executable. 

Detecting encrypted pyinstaller executables is simple. If  pyinstxtractor is used, it would indicate this as shown in Figure 1.

Trying to extract encrypted pyinstaller archive
Figure 1: Trying to extract encrypted pyinstaller archive